
How to crochet in the Front Loops Only
Learn how to crochet in the Front Loops Only of your crafty project in this step-by-step tutorial.
If you’ve just reached a stage in your crochet pattern that reads ‘FLO’, this means you need to crochet in the ‘front loops only’ of the indicated number of stitches.
Before we deep dive into this topic, whether you’re working in the round or back and forth in rows, crocheting in FLO is a lot simpler than you expect it to be. What a relief, hey?!
In this blog post, you’ll discover what FLO means, how to understand it in a written crochet pattern, and most importantly, you’ll learn how to crochet in the front loops of your project (whatever your current crochet project might be!).
Let’s get to it!
What does FLO mean?
FLO means ‘Front Loops Only’ and can be found in a variety of crochet patterns from amigurumi to clothing. Thankfully, this stitch technique requires you to do exactly what it sounds like: crochet in the front loops only of a stitch or range of stitches.
To put it simply, this means instead of inserting your crochet hook through your next full crochet stitch, you bring it up in between the stitch so your crochet hook is only attached to the front yarn strand of that stitch.
This effectively means that when you crochet in the Front Loops Only the back side of your project will have a raised line where the 'back loops’ are, as you haven’t picked these up with your crochet hook. Here are some examples of what this looks like.
Crocheting Front Loop Only in the round

Left image: crocheted circle face-up / the right way up. Right image: the same crocheted circle face-down, where you can see the back loops from the last round.
The last round of the crocheted circle shown in the images above has been crocheted using the Front Loops Only. As you can see, it isn’t really visible when you look at the front of the project, however when you turn the circle over you can see a clear line just below the last round. This circle line are the back loops of the stitches that weren’t crocheted into in the last round due to the FLO instruction.
Crocheting Front Loop Only back and forth in rows

Left image: crocheted rectangle face-up / the right way up. Right image: the same crocheted rectangle face-down, where you can see the back loops from the last round.
As for the rectangular crocheted piece that was made by crocheting back and forth in rows, the last row of this piece was also crocheted using the Front Loops Only. Again, this isn’t visible from the front of the piece, but as soon as you turn the piece over you’ll see a little line under the last row. This line is again, the back loops of the stitches that weren’t crocheted into in the previous row due to the FLO instruction.
There is however one big difference between crocheting in the front loops when you’re working in the round versus crocheting back and forth in rows.
What is the difference between crocheting FLO in the round vs. back and forth in rows?
When you crochet in the FLO of your stitches, it will always be on the same side of your project if you’re crocheting in the round, but it could be on different sides of your project if you’re crocheting back and forth in rows. Let me explain…
The most helpful thing to remember when trying to figure out which loop of your crochet stitch is the ‘front loop’, is to look at your project when you’re crocheting. No matter what, the ‘front loop’ of your stitches will always be on the side facing you, which is also the side you insert your crochet hook into when you are crocheting.
Now remember that the big difference between crocheting in the round compared to back and forth in rows, is that you don’t need ot turn your work when you crochet in the round. BUT you do need to turn you’re work when you’re crocheting back and forth in rows.
This means that the ‘front’ of your project piece AND the ‘front loop’ of your crochet stitch will vary as you turn your work if you are crocheting back and forth in rows. In comparison, the ‘front’ of your work and the ‘front loo’p of your crochet stitches will always remain the same if you are working in rounds because you won’t be changing direction or turning your work.
Now let’s get to the fun part and learn how to crochet in the front loops only!
Front Loop Only (FLO) crochet tutorial
Before we start the Front Loop Only (FLO) crochet tutorial, I need to mention that I am demonstrating this stitch using single crochet stitches (in US terms). However, the same steps apply if you were using a different stitch, such as 'Double Crochet’ in US terms.
Step 1: Identify the ‘front loops’
Firstly, you need to identify the ‘front loops’ of your crochet project piece. This is simply the side of the crochet stitch facing you when you’re crocheting.


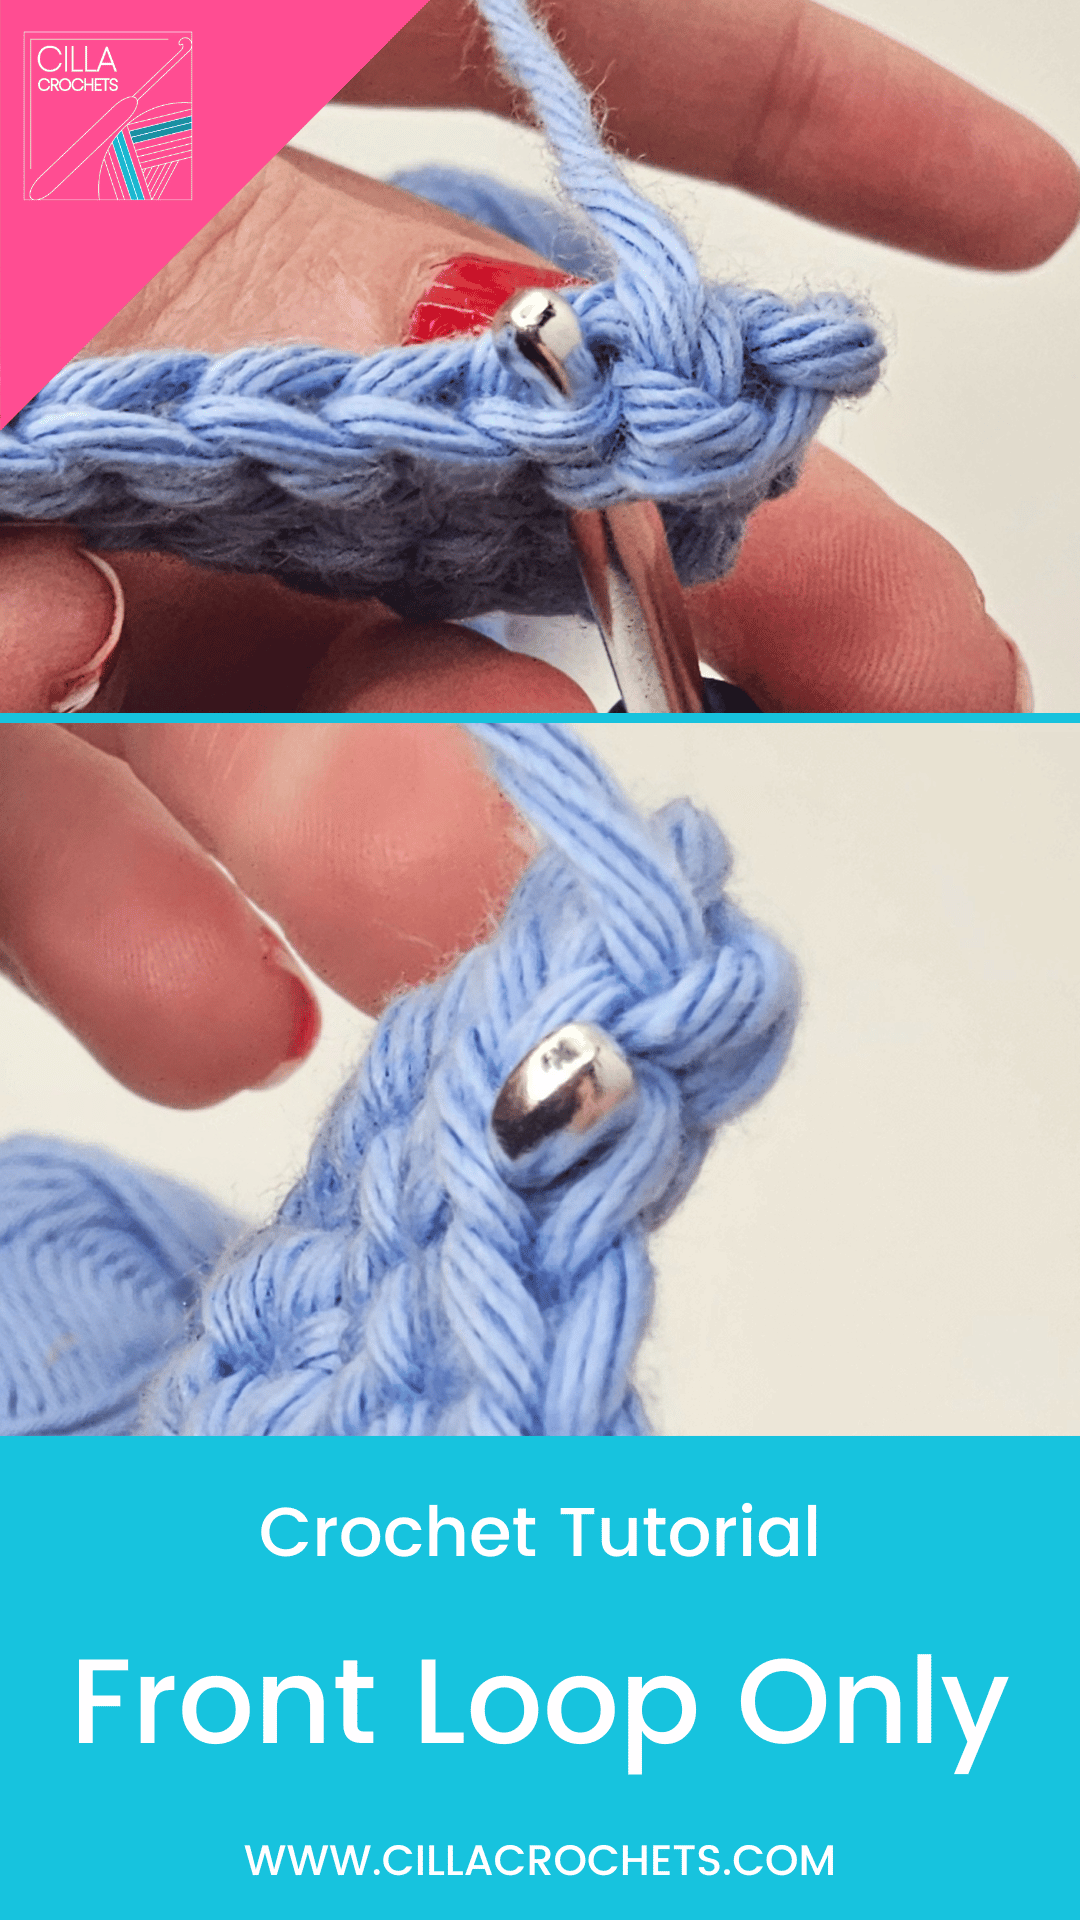
Step 2: Crochet into front loop of stitch
To crochet into the front loop of the stitch, insert your hook into the stitch as per normal, but instead of taking your hook through to the back side of your crochet piece, bring it up through the middle of the stitch as shown below.

Step 3: Complete your crochet stitch as normal
Now that your hook is through the centre of the crochet stitch, finish the stitch you are crocheting. In my case, it’s a Single Crochet (US terms), so I yarn over, pull through the ‘front loop only’, yarn over, and pull through both loops on my hook.

Step 4: Check your work (Optional)
As an optional final step (in particular, if you’re new to crocheting in the front loop only), you can check that you’ve done the stitch correctly by looking at the back of your work. When you check the back of your work, look for a little line of yarn from the top of the row/round below. If it’s there, this is the back loop that wasn’t crocheted into and means that you’ve crocheted this stitch correctly. Well done!

When a crochet pattern says ‘Front Loop Only’ how do I know how many stitches to make like this?
It may sound tricky to know how many stitches to crochet in the ‘Front Loop Only’ of, however your pattern should explain this clearly. Most commonly ‘Front Loop Only’ (FLO) is used for an entire round or row. As such, it’s abbreviation ‘FLO’ is normally placed at the beginning of the round/row.
For example, the instructions R3: FLO [2 sc, inc] x 6 (18) would mean to crochet all 18 stitches in round 3 in the front loops only.
It’s rare that FLO is used for part of a round or row, but when it is, this will usually be explained in the pattern itself or in the notes of the pattern (at the beginning). So I do always highly recommend reading through all of those beginning bits of a pattern, because this is usually where you’ll find anything unique to the pattern.
If you still aren’t sure however, it’s always best to contact the designer of the crochet pattern you’re using in the first instance. Most crochet designers are super helpful and approachable, and would much rather you ask then you give them a bad review, or even worse, you give up on the project.
I hope this crochet tutorial has helped you learn how to crochet in the ‘FLO’ of your projects.
If you have any questions at all or would like to share pictures of your makes with me, don’t forget to get in touch with me on social (icons below), comment on this blog post below, or email me here. I’d love to hear from you!
Until next time, happy crocheting,
Cilla x